Sunday, December 11, 2011

Wedding Album

Well...this is an 8 x 8 wedding album that I made for a friend back in October.  I used my new Epson 1100 to print these very cool graphic files I purchased from Moonbeam1212's Rosy Glow and Petal Wings at Jaguarwoman.com.  What fabulous eye candy is found at that site!  You've gotta go and see!  I did print and cut roses and butterflies on each page and then pop dotted them for embellishments.  For the front and back covers, I used acrylic sheets and engraved a monogram onto the front using my awesome KNK Maxx.  It did a spectacular job.  I found the "filler" lines for the inside of the monogram in the Make the Cut gallery.  There is a small little glitch that didn't engrave.  I left it as it was, but if I do this again...which I'm sure I will since its so cool and a breeze with my handy dandy Maxxer...I will design my own filler lines because as I've seen since, it is pretty easy to make.  Bound it  with my Cinch...so easy, it cut like butter, even the plexiglass.  Wah-Lah.  Decided to forgo the ribbon on the binding wire.  The bride isn't for all the frilly girlie stuff.  I left it so that she can put her own pics in it too.  The simpler the better.  Ü 
So here you go...some pics I took of this fun project. 

Saturday, November 12, 2011

A "Quick" Wedding Card...

...Sure!  Ha!  Here we go again.  I knew about the wedding well before hand.  So the planning started as to what I wanted to make...in my head. The night before...yep...I start designing it in my Make the Cut software.  The DAY of the wedding, 2 hours before the wedding, I get ready to cut it out using my awesome KNK Maxx.  Well, so I started to, but then I decided to change the design a little.  Now we are down to 45 minutes before the wedding.  My hubby has to get there early because he's  an usher, and comes in the room and asks if he should go to the store and pick up a card.  Ha!  FUNNY GUY!!!  No.  Now my plan is, cut it all out, get changed quick, go to the ceremony, come home right after, put it together, stuff some cash in it and put it in an envelope, and go.  Whew.  So run home I did and put it together before the reception.  Then I came downstairs to show my dearest hubby my new creation and waved it in front of him and exclaimed..."there...I saved you $2.50"!!!  hehehe.   He didn't laugh.  Blahahaa!  


Tuesday, September 6, 2011

KNK Denver Retreat...and Happy 30th Wedding Anniversary!

What a weekend!!! Ü
In May, I told my hubby that when my Cricut "dies"...which it has to get used more often than it does for that to happen...and then when my "back-up" Expression dies following the first...that I had found my next machine. The 15" KNK Maxx.  And I knew who I wanted to buy it from--Sandy McCauley the most dedicated, generous, knowledgeable rep ever! So to my surprise he says "If it will do everything you want it to do...then get it!  Happy Anniversary"!!!  How could I argue with that?  He wanted to get something really nice for our 30th Anniversary.  I did drag my feet just a teenie bit, but decided I better go with it before he changes his mind. ;)  So in June, I joined the proud group of people that now owns a beautiful and powerful cutting machine.
Now, I did notice that there was a KNK retreat lead by that awesome dealer of mine in Denver CO...but it was on the very weekend of our 30th anniversary.  So my mind went to scheming  on how I could convince my dear man that we were taking a small vacation to Denver...and "Oh yeah, I'll be in class all weekend".  Yep...so I dropped it and didn't even mention it.  There were going to be other retreats.  
Well....Sunday August 7th changed all that.  An email from Sandy stated that there was good news and bad news regarding the retreat in Denver.  Good News: There were just a few more spots open for the retreat for anyone interested and Chad from Accugraphics was going to be there all weekend and he was bringing with him the new KNK cutting machine, the Zing.  Bad News: This was going to be Sandy's LAST retreat of it's kind!!!  NO!!!  I need to go yet!!  So without delay, I informed my best bud of a hubby about what the class is all about, gave him my reasons of why I needed to go...to insure our investment in this excellent machine was going to benefit us in the long run.  I told him I knew it can cut more than paper, and I could learn it by watching those great videos Sandy made, and lots of investigating on the internet.  But this retreat was going to be the boost of information I need to jump start me.  To have both of the guru's of Klic-N-Kut in one room, teaching all weekend.  I have to go!! So after putting the cost on paper, and telling dh that I think it would be best that I should go alone because I don't want to miss one minute of class...he said "If this is something you really want to do and can make it happen, then make it happen.  Happy Anniversary"!!!  WHAT??!!  The machine was my anniversary gift, and now this? There is no way I could get him anything close to that as a gift....maybe he considered my being away was his gift...LOL!!  Anyhow, needless to say, everything fell into place within 24 hours. 
So Friday Sept 2nd I boarded the plane and flew by myself for the first time.  Well, just getting to the airport was a feat in itself. The very same time as I set out to leave for my 90 minute commute to Milwaukee, the weather decided to kick in with 70-80 mile an hour wind gusts.  I THOUGHT I WAS GOING TO DIE!  Semi's were swerving in the wind.  Rain was coming down hard, cars were going slow...I had to get to the airport! I wondered if I was going to see my first tornado. But not like this!!  I wanted to be in a safe place to see my first tornado...not on a highway!  So trying to use a sound mind, and as I was listening to the radio station keeping me updated on the storm.  There were no tornado warnings, it was a straight wind front going through really fast. Watching for the best time to pass semi's was my mission.  I waited until there was some sort of wind break, line of trees or hillside, and then I would take my shot and hammered pass those large moving obstacles.  I did that for about 40 minutes, and then there was clear sailing.  I did hear about 10 minutes after I got out of my county that a semi trailer did flip over on the highway.  Thank goodness they were behind me.
Okay...fast forward to the retreat.  I got to the meet and greet a little late, but I was there! Ü  What a great time!  What a room full of talent!!!!  Words can't express the fun we had.  The learning...my head did explode by 7:30 pm Saturday night.  I would do it again though!  I got a wonderful welcome from Sandy...it was like we had known each other for a long time.  Oh and then there was Lynn...the master of organization and skills of all types of media!!  Such a wonderful lady.  She even arranged for Linda, who is equally fabulous, sweet and generous, to stop at the Container Store and pick me up a couple of plastic containers for my blades and blade holders and surprise me with them on Sunday.  Judy and Cherrie and all their hard work in coordinating the retreat with Sandy.  Millie, Ouiszee, and Helen, oh my...you ladies are an inspiration!  Thanks to Andrea, my table partner.  She put up with my fidgeting as my daughter calls it. I hope she loves MTC!! Big thanks to Linda and Kim who kept checking on me to see if there was something I wanted to cut.  I hated that I couldn't bring my machine and had to rely on everyone else's.  I tried to get Chad to let me keep the Zing...didn't work.  He didn't even let me carry it into the airport after we were dropped off by the hotel shuttle.  Guess he didn't like the look in my eyes!  LOL  Oh and a BIG THANK YOU to Sandy, Chad and Elina....they decided to leave the hotel and get to the airport really early and we got to share the shuttle ride together.  I got to pick their brain just a tiny bit more! SCORE!
So here are a few pics I took off my cell...I'm really terrible at taking pictures with that thing.
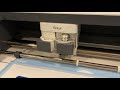
The ZING!

LYNN: the Ultimate Crafty Lady!
Luv her!!

CHAD helping attendee's with MTC

ANDREA: playing with her new MTC program Ü

SANDY teaching us the Tippity-Tip of the iceberg!!!
♥  Thanks Sandy!!!! ♥

The Nugget Boxes that I made for everyone.
These were made with MTC and my Maxx!
Oh what a FUN weekend!  Ü  I'm so happy I had that opportunity!

Thursday, August 11, 2011

Another GREAT SALE AT DIGI SCRAP KITS by TRINA CLARK!

Trina Clark does it again with a wonderful sale on her sweet CLIP ART
All sets are 88¢!!! You can't go wrong with these beautiful files.  And best of all, they work awesome with Make The Cut!  Bring the images in with a pixel trace, or break it into layers and piece it together to make a dimensional design on your scrapbook page or card.  She has hundreds of fun artwork on her site...and at that price, it won't hurt your pocket book! ENJOY! Ü 

Monday, July 25, 2011

AMAZING THINGS HAPPENING OVER AT MAKE THE CUT!!

Have you heard??!!!  Make The Cut V. 3.3.2 has been released and is now available for download!  It is OUTSTANDING! 

Andy and company have outdone themselves and added some very COOL features to this version.  Truly brilliant and easy to use.  And if you love Lettering Delights Graphic Art and SVG's, MTC has integrated the ability to access your SVG's right from the software. Again...BRILLIANT!  There are many other new features I haven't even touch yet...so I'm off to play, and hopefully I'll have something completed to share here. Ü

If you were on the fence about MTC...jump across already and join us. LOL  You won't be disappointed.  And at this great price, it is so worth the investment.  And remember, Andy doesn't charge for updates. Donations are completely up to you!  Isn't that terrific Customer Service?!!?  So if you want to go straight over to buy, this link will take you right to the order form. (again...Ü) 

Wednesday, July 13, 2011

ONE DAY ONLY!!! 40% OFF At MYGRAFICO.com

One day only...tomorrow July 14th, MYGRAFICO.com will be having a BIG SALE--40% OFF!  Don't miss this deal on some fantastic must have SVG Files, Digi Paper Paks, Printables, and Clipart.  40%!!! WOW!!  Click HERE to get your deals!  Enjoy! Ü
Just look at a few of these adorable sets!
If you want to become an Affiliate too...just click follow this link:
Webmasters Earn Money Here!

Sunday, July 10, 2011

Calling For MYGRAFICO Affiliates!

Do you like graphics for digi scrapbooking, card making and print and cut.  Maybe SVG files for cutting with MTC or SCAL.  How about digi paper packs or digi stamps?  MYGRAFICO.com has all of that. Besides they have just started taking applications for AFFILIATES! YAY!  Click on the button below to take a look at what they offer...and if you like, click HERE to sign up for Affiliate opportunities. Ü
Mygrafico Digital Arts & Crafts

Photobucket

Saturday, June 25, 2011

SVGCuts 3D Alphabet SVG Kit


Now you can use your cutting machine and Make The Cut! to create custom word art for your home! Create baby names and kids' names for childrens' rooms or create your last name for your family room. Spell out any word to go with any theme in your kitchen or TV room.
Spell out a team name for your favorite sports fan or create just one embellished letter representing your last name for your living room. They also make fabulous gifts! 
Your download includes everything you need to make all 26 letters of the alphabet using any mat size! Even 6x12 mat users can create up to 5.5" tall letters and 12x12 mat users can create letters up to 6.5" tall. 12x24 mat users can even create letters up to 11" tall if using 12x24 paper. Letters shown in photos are 6.5" tall. You can get them by clicking right HERE. Pick up this awesome set today!!! Ü

Photobucket

Friday, June 24, 2011

Free SVG File– 06.15.11 – Step Right Up Caption

Here's another Freebie from SVGcuts!  Use this file with your Make The Cut! software program to add a bit of fun to your layouts or cards.  Actually this would be so cute to cut it out of vinyl and put it on a stepping stool for a kiddie!  They have AWESOME files and well as video tutorials!
Thanks SVGCuts for another little nugget!

Free SVG File – Sure Cuts A Lot – 06.15.11 – Step Right Up Caption


Photobucket

Saturday, June 11, 2011

MTC and SVG CUTS Peony Cottage SVG Kit

Oh my...when I saw this file, I had to have it!!!  It's so darn CUTE!  I made it for my 7 year old great-niece Kamiko.  She had a dance recital last weekend and I missed it.  So I thought about this new kit I bought from SVGCUTS.com and decided to make it and fill it with goodies.  I think she'll like it. Hopefully her 20 month old brother doesn't love it to pieces...literally!  Here's the link for the kit:
It was super easy to make using my MTC software. This tutorial is so well done!  I love it.  I first printed out the directions, it has all the sizes and paper type (solid or patterned)  printed under the pic of each piece.  I just imported each piece onto my Make the Cut! mat, and cut everything out on my cutter. Inked edges and then followed Mary's video for assembly on their website.  Super, SUPER Easy! (did I say that already??)  I want to make myself one...for what, I have no idea.  But it's so darn CUTE...I think I said that already too! LOL  You can easily customize your design for each season, just by changing your paper choices.  This file is so ingenious!  Great Job Mary Rudakas!!  There's a few more fun files that I purchased and will have to make asap.  Maybe I'll wait to make them until I get that new cutting machine.  Which one you say???  One? hahahaha....time will tell, and then I will shout it out here and on the MTC forum of course! Ü
Photobucket

Friday, June 3, 2011

5 NEW LETTERING DELIGHTS Summer SVG Sets!!

Look at these awesome MUST HAVE summer svg files from Lettering Delights!  They are totally sweet! 
I swear that they look into my wishlist and play around with my head! LOL  I have 4 of these graphic sets sitting there in my wishlist...and now look what they did! They took the work out of converting it into svgs to cut out in my MTC software program.  
Now this is a "no brainer"! I gotta have these.  If you want to get a better look at these sets, just click on the pics and it will take you right to LD.  And we all love using coupon codes when ordering...so don't for get to include this when checking out!  FiveSVGS  Now off to play....
ENJOY!! Ü
Coupon Code: FiveSVGS
Photobucket

Sunday, May 22, 2011

My Turn...MTC BLOG HOP! Day 22

Alrighty then...if you been keeping up with the Make The Cut! Blog Hop this month, you have now enjoyed 21 days of fabulous projects by amazing crafters.  If you have missed a day or two, just click on the MTC button on my right sidebar and it will take you to Christy's blog...she has the Host link for each day listed there.
Now on to my project. The inspiration for this mini photo album is the grand daughter of one of my clients.  Wendy's baby sister is due this week, and I thought a little gift to include her in this exciting event would be fun.  I decided I was going to demonstrate the Print 'n Cut method using Make the Cut! for this chipboard book.  To my delight, it was sooooooo easy! 
For each page I started with bringing in a square from the MTC! Basic Shapes file and resizing it to 6" x 6".  Then opening my Lettering Delights Baby Girl Mini Album file, I chose the paper I wanted to use and resized the texture to 32% to fit the square.  For each page I brought in a coordinating image from the LD Baby Animal Squares Graphic Set.  Setting the Visualization properties as follows:
Apply Changes, check Set Image as Texture and Import. Resize your image and texture to your desired size on the MTC! virtual mat.  When all of your images are imported, resized and textured, send each page to your printer.  Place your printed cardstock onto your cutting mat and load into your machine. Before cutting out your images, go back to your virtual mat in MTC! and select the image you will be cutting out.  To simplify your cut, press shift/ctrl/Z keys on your computer.  You will get a pop up box (Auto Simplified Node Count) that will tell you how many nodes or spots the blade will go to around your image/path.  Hit  OK or the enter key and repeat this process until no further simplification can be done.  This process will help to make your machine cut  around your image more quickly.  From the drop down tab under "Cut Project With..." select your cutting machine.  Depending on the thickness of your cardstock or chipboard, you may want to select from the drop down box how many passes you want to cut your design, as well as how fast you would like it to cut. Press "Start!" to cut.  Complete this process for each page of your album. Once everything is cut out, ink edges, assemble and embellish as desired.
So here is my finished album for Wendy...you can double clink on pic to get a closer look!
If you would like to purchase this FANTASTIC software for your creative projects, please click my MTC! button below and you will be directed to the order form.  This updated and fast growing software is on sale for a limited time, and you will want to pick it up now while the price is still HOT. And FYI...all updates are FREE and new cutting machines are being added to the supported list when available. This is a list of machines that are supported by Make The Cut! at the time of this posting:
* Klic-N-Kut™ Series
* Black Cat Cougar and Lynx
* Boss Kut Gazelle
* USCutters MH/LaserPoint Series
* Craftwell eCraft
* Any cutter machines that support HPGL printing (Craft ROBO, Silhouette, etc)
* And many more to come in the near future Ü
To purchase these fun files I used with MTC! just click on the pictures below and it will link you straight to Lettering Delights.  There's so many fun files...something for everyone!
Thanks for looking!  I hope you consider this AMAZING software...you won't regret it...just ask anyone on the MTC! forum. Ü