


Alrighty then...if you been keeping up with the Make The Cut! Blog Hop this month, you have now enjoyed 21 days of fabulous projects by amazing crafters. If you have missed a day or two, just click on the MTC button on my right sidebar and it will take you to Christy's blog...she has the Host link for each day listed there.
Now on to my project. The inspiration for this mini photo album is the grand daughter of one of my clients. Wendy's baby sister is due this week, and I thought a little gift to include her in this exciting event would be fun. I decided I was going to demonstrate the Print 'n Cut method using Make the Cut! for this chipboard book. To my delight, it was sooooooo easy!
For each page I started with bringing in a square from the MTC! Basic Shapes file and resizing it to 6" x 6". Then opening my Lettering Delights Baby Girl Mini Album file, I chose the paper I wanted to use and resized the texture to 32% to fit the square. For each page I brought in a coordinating image from the LD Baby Animal Squares Graphic Set. Setting the Visualization properties as follows:

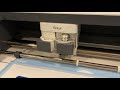
Apply Changes, check Set Image as Texture and Import. Resize your image and texture to your desired size on the MTC! virtual mat. When all of your images are imported, resized and textured, send each page to your printer. Place your printed cardstock onto your cutting mat and load into your machine. Before cutting out your images, go back to your virtual mat in MTC! and select the image you will be cutting out. To simplify your cut, press shift/ctrl/Z keys on your computer. You will get a pop up box (Auto Simplified Node Count) that will tell you how many nodes or spots the blade will go to around your image/path. Hit OK or the enter key and repeat this process until no further simplification can be done. This process will help to make your machine cut around your image more quickly. From the drop down tab under "Cut Project With..." select your cutting machine. Depending on the thickness of your cardstock or chipboard, you may want to select from the drop down box how many passes you want to cut your design, as well as how fast you would like it to cut. Press "Start!" to cut. Complete this process for each page of your album. Once everything is cut out, ink edges, assemble and embellish as desired.
So here is my finished album for Wendy...you can double clink on pic to get a closer look!


If you would like to purchase this FANTASTIC software for your creative projects, please click my MTC! button below and you will be directed to the order form. This updated and fast growing software is on sale for a limited time, and you will want to pick it up now while the price is still HOT. And FYI...all updates are FREE and new cutting machines are being added to the supported list when available. This is a list of machines that are supported by Make The Cut! at the time of this posting:
* Klic-N-Kut™ Series
* Black Cat Cougar and Lynx
* Boss Kut Gazelle
* USCutters MH/LaserPoint Series
* Craftwell eCraft
* Any cutter machines that support HPGL printing (Craft ROBO, Silhouette, etc)
* And many more to come in the near future Ü

To purchase these fun files I used with MTC! just click on the pictures below and it will link you straight to Lettering Delights. There's so many fun files...something for everyone!


Thanks for looking! I hope you consider this AMAZING software...you won't regret it...just ask anyone on the MTC! forum. Ü


.jpg)


Oh, very very cute!!!
ReplyDeleteWow, that is absolutely adorable! Great job!
ReplyDeleteAwesome project!!! I will have to go and get that lettering delights file! Thanks for hosting a day.. you did a SUPERB job!!!!
ReplyDeleteAll I have to say is wow! That's amazing.
ReplyDeleteFun cute album! Great job. TFS joy4umetoo at hotmail dot com
ReplyDeleteYou ALL are so SWEET!!! I really had fun with this book...MTC and LD work so nicely with each other. I need to make more goodies... Ü
ReplyDeleteHugs...Kathy ♥
Wow! Beautiful alum. And many, many thanks for the tutorial. I haven't been brave enough to try print and cut, but after printing this blog out, I'm going to do it this week. Fun!
ReplyDeleteOh my goodness Kathy this is gorgeous!!! what a great project and fantastic gift for the little girl!
ReplyDeleteWhat a great album and wonderful instructions.Thanks for sharing!
ReplyDeleteChristine (MTCFAN)
Great project! Thanks for being part of the forum and the blog hop. I enjoy seeing the creativity that others have. This is so cute, I may have to borrow some parts of it.
ReplyDeleteThanks for posting this! It was really helpful. Love the LD sets! I wasn't in love with them until I saw them in use. Love how the album turned out. :)
ReplyDeleteBeautiful project!!!!!!!
ReplyDeleteLove your choice of colours and how it all came together so cute!
I am jealous that you have such visions to create. Great job!
ReplyDeleteThanks so much for your instructions. I just made an 8x8 mini album 2 days ago from Lettering Delights using the Banner Day Mini Album. Wish I had the instructions then. I just sized everything in Microsoft Word and printed and then cut out manually. Next time, I will know better. Thanks for sharing and I love MTC. I am a new follower. patnbobcuddy at gmail dot com
ReplyDeleteThis is just fantastic--thanks for sharing!!
ReplyDelete